
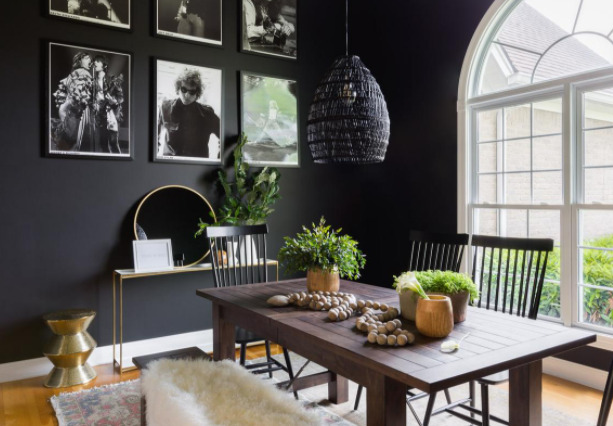
How Can Paint Change A Room?
Would you like to change the appearance of a room within a low budget? Paint placement will be the best solution.
If you are interested in lengthening, shortening, expanding, or increasing your room’s ceiling height, calculatedly placing paint may give you a solution.
But, to get these advantages, you have to know first how to color a room in the right way. Otherwise, it will bring you nothing except give your room an inferior look.
However, in this write-up, we have demonstrated how paint can change your room and in which way you should paint it. So, without any further ado, let’s get started.
Why Should You Paint Your Room Inside & Outside
Before knowing how paint alters a room, you should understand why it is necessary to paint a room. Well, there are several reasons behind it. In this segment, we have focused on some of the prominent reasons to clarify why you should paint your room inside and outside.
- Painting the interior and exterior of your room may increase the real estate value of your home.
- It helps accelerate the curb appeal.
- Coloring your room with low VOC and Zero VOC prompts healthy indoor air quality.
- Keep dirt and dust to a minimum level. Especially, rooms with a plaster wall keep dirt and dust at a bay.
- Provides your home’s new look size and shape.
- Ensure a healthy environment inside the room if you use paint with low or zero VOC.
How Can Paint Change A Room?
According to Paint Centric, paint can shape a room, but you have to follow the right way. Whatever, here we’ll show how a paint shapes or changes a room. So, let’s see.
1. Expand & Shrink
One of the simplest ways to alter the appearance of the size in your room is by the paint colors you select. Light color paint makes a room appear comparatively larger where dark color makes it close-in a space. If your room size is small, then it is better to choose a shade of light gray, light blue or white that will make the room size feel extended. On the contrary, you can go for a darker color if you hold a larger room that will give you a romantic or moody vibe.
2. Lengthen & Shorten
To broaden or pare down your room, paint placement can play a significant role. To make your room feel longer, paint the ceiling and far wall with the highlight color. Only painting the far wall can make your space shorter.
3. Wide Open
Many people now use dado rails which are also known as chair rails that are a kind of molding placed horizontally to the room’s wall. If the darker color is used beneath the dado rails, the color can make the room appear wider. This color also aids in anchoring the room.
In contrast, if you want to make a room appear more compact, go for the method. Paint the far wall and ceiling with light and bright color, keeping the rest of the walls darker. This method helps close off the space, decreasing the appearance of a wide room.
4. Raise or Lower a Ceiling
How paint can raise or lower your ceiling? This question may come to your mind, right? Well, when you paint the walls a darker shade and keep the entire ceiling brighter, it will give the appearance of a higher ceiling. On the contrary, a darker ceiling with brighter walls will make the ceiling feel lower.
How To Paint a Room [Step-by-Step Guideline]

It is essential to paint your room in the right way to give your room a better shape. Here is the step-by-step guideline.
Step-1: Prepare the Room
Before painting, you have to prepare your room properly. How to prepare the room? We have pointed out below, what things you should do before painting.
- Try to remove all furniture from the room. If not possible, then cover up all the furniture with large pieces of thick clothes.
- After removing or covering up the furniture, remove the electric components like light, switchboard, and clocks and turn while removing the components, make sure that you have turned off the main switch.
- Now, cover the entire floor, door, and electric lines using thick clothes.
Step-2: Prepare The Walls & Trim
After preparing your room, you have to prepare the walls and trim as well. Follow the guideline below to prepare the walls and trim.
- Before painting, it is a better idea to wash all the walls and trim with a cleaner. Make sure that all the dirt and grease have been removed perfectly that will let the paint stick better.
- Flash a light at the walls to have a closer look at the flaws on the surface.
- If there are holes and cracks in the walls, fill them with spackle or patching blend.
Step-3: Paint the Ceiling
At this point, you have to start painting with the ceiling that will avoid paint splashes on your walls and trim. Then follow the below instruction.
- Take 3 cups of ceiling paint [The Amount Can Increase or Decrease With The Ceiling Size] in a container. Start painting from the brim of the ceiling along the entire room’s perimeter, using an angled paint brush.
- Use a nap roller which is ⅜ inch to paint the ceiling from one end of the room to another. Now, start rolling the paint in the same direction.
Step-4: Paint The Trim
- It is better to go for painting trim first rather than walls. Allow the paint dry, then shut off the trim and kick off painting the walls. You can paint your walls first, if the trim’s top edge isn’t extended enough.
- Before painting the trim, you should think about a couple of things like are you going to just paint the trim or the windows and doors as well. Painting a door is comparatively easier if you remove it first.
- Try to use quality acrylic enamel paint with an angled paint brush which is 2.1/2 inch.
- Use Tape Around the trim’s edges before painting the walls.
Step-5: Cut in The Walls
- It is a good idea to cut in a single wall simultaneously, then instantly roll out the wall while the cut-in paint is still wet. It will mix much better with the wall paint.
- Take a small container and pour 3 cups of paint on it. Start painting from the edge of the trim and baseboard as well as along the ceiling’s parameter using an angled paint brush.
Step-6: Roll Paint The Wall
- Make sure that you have purchased the paint with a paint prop before you start.
- Fill the roller tray a little over half-full with paint.
- Now, stow the roller with paint from the tray and start rolling paint on the wall from the baseboard to the ceiling.
- Overlap the previous one and paint the entire height of the wall properly. If needed then apply a double coat.
That’s the way to paint a wall with ease.
Tools and Materials That Are Require To Paint A Room
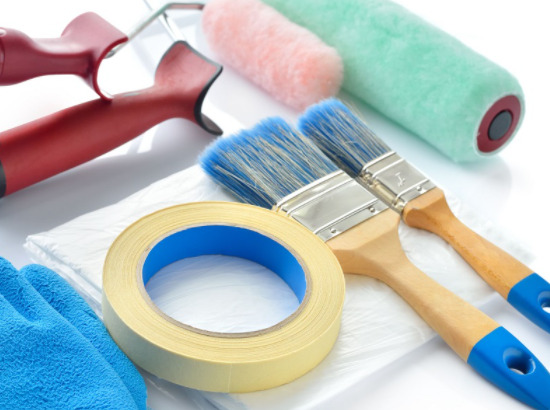
Here is the tools and materials list that are required to paint a room perfectly.
- Paint
- A small container
- Several pieces of cloths
- Long-handed roller
- Paint brush
- Paint tray
- Stepladder
- Painter’s tape
- Paint stir stick
- Trim paint
- Nap roller
- Wall spackling compound
Final Thought
So, it was all about how paint can change a room. In the above sections we have demonstrated how your room shape can be changed by choosing the right color of the paint. Right choice of paint color can make a room appear short, broadened, and close-in. That’s why, we recommend, before painting your room, measure the room size first and then select a color. However, it has also been illustrated how you can paint a room properly. You can apply the methods we have given and can paint your room on your own without taking help from professionals.
- Category :
- Type :